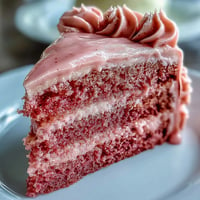
 Save to Pinterest
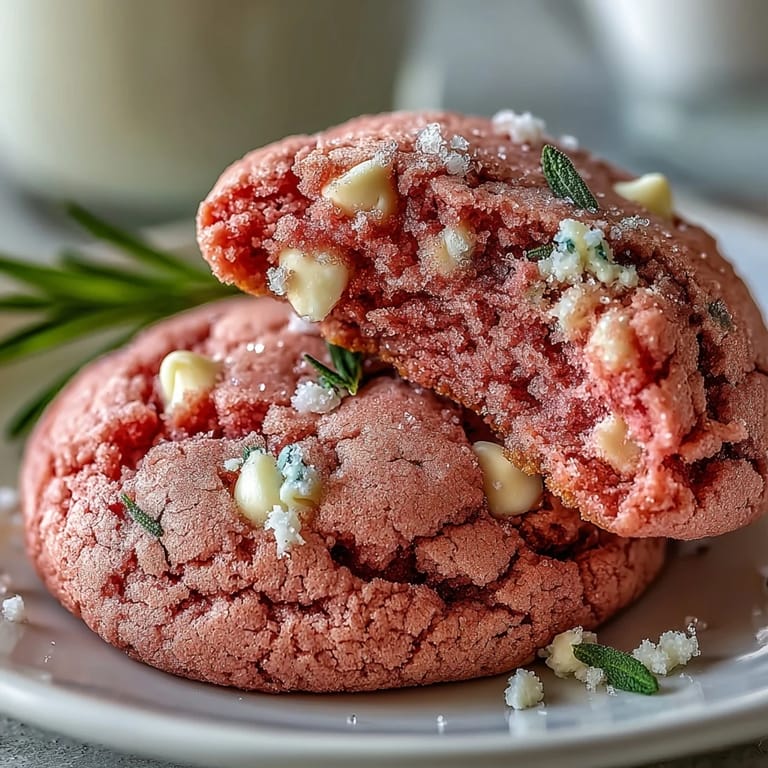
 My daughter walked into the kitchen one Saturday morning and announced she wanted cookies that looked like a sunset. I had no idea what that meant until she showed me a picture of something pink and cheerful. We didn't have much time, but I had white chocolate chips and a little bottle of gel coloring tucked in the back of the drawer. What started as an experiment turned into the softest, chewiest cookies we'd made in months, and the pink was so ridiculously happy that even my skeptical husband asked for seconds.
I brought a batch to a potluck once, and three people asked if I used boxed mix. When I said no, they looked at me like I'd performed magic. The truth is, these cookies are simpler than most sugar cookies, but the pink throws people off. They expect complexity, but all you're really doing is creaming butter, folding in chips, and letting the oven do the rest.
Ingredients
- All-purpose flour: This gives the cookies structure without making them cakey, and I've learned that measuring by weight keeps them consistent every single time.
- Baking powder and baking soda: The combination gives you a little lift and a lot of chew, which is exactly what you want in a cookie that's meant to be soft.
- Salt: Don't skip it, even though it seems like a tiny amount, because it balances the sweetness and makes the vanilla taste more like vanilla.
- Unsalted butter: Softened, not melted, is the key to getting that fluffy texture when you cream it with the sugar.
- Granulated sugar: It dissolves into the butter and creates those slightly crackled edges that make the cookies look homemade in the best way.
- Egg: One large egg binds everything together and adds just enough moisture without making the dough wet.
- Vanilla extract: Use the real stuff if you can, because it makes the whole kitchen smell like a bakery.
- Pink gel food coloring: Gel is stronger than liquid, so you only need a little bit, and it won't throw off the dough's consistency.
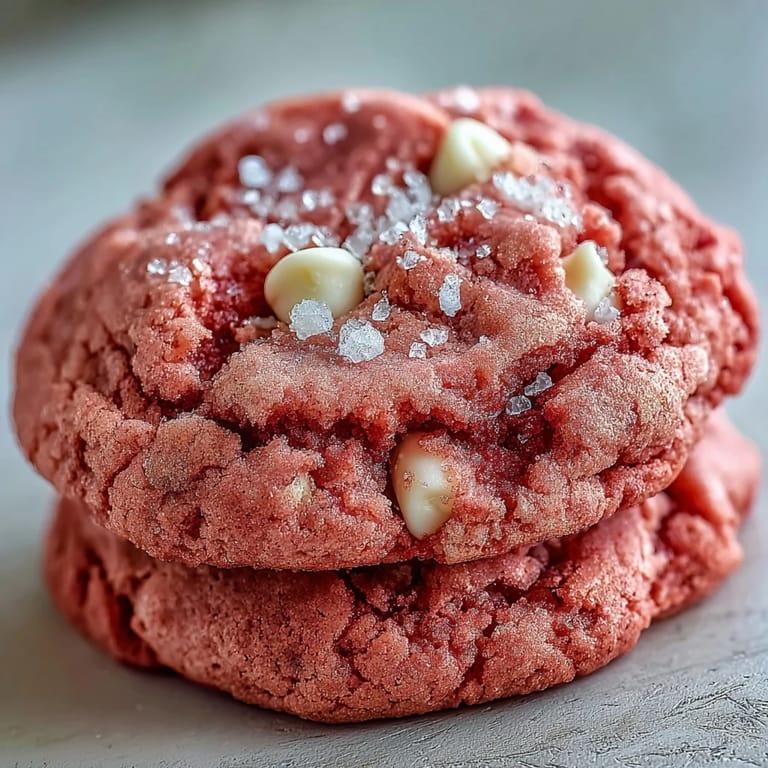
- White chocolate chips: They melt just slightly in the oven and create little pockets of sweetness that contrast perfectly with the soft dough.
Tired of Takeout? 🥡
Get 10 meals you can make faster than delivery arrives. Seriously.
One email. No spam. Unsubscribe anytime.
Instructions
- Whisk the dry ingredients:
- Combine the flour, baking powder, baking soda, and salt in a medium bowl and whisk them together so the leavening gets evenly distributed. Set it aside while you work on the wet ingredients.
- Cream the butter and sugar:
- Beat the softened butter and sugar together until the mixture turns pale and fluffy, which usually takes about two to three minutes. This step adds air to the dough, and that's what makes the cookies tender.
- Add egg, vanilla, and coloring:
- Beat in the egg and vanilla until everything looks smooth, then add the pink gel food coloring and mix until the dough is evenly tinted. You can add more or less depending on how bold you want the color to be.
- Mix in the dry ingredients:
- Add the flour mixture to the wet ingredients gradually, mixing on low speed just until the dough comes together. Overmixing makes cookies tough, so stop as soon as you don't see any dry streaks.
- Fold in the white chocolate chips:
- Use a spatula to gently fold in the white chocolate chips so they're evenly distributed throughout the dough. This is also a good time to sneak a taste if no one's looking.
- Chill the dough:
- Cover the bowl with plastic wrap and refrigerate the dough for thirty minutes. This helps the cookies hold their shape in the oven and prevents them from spreading too thin.
- Preheat and prep:
- While the dough chills, preheat your oven to 350 degrees Fahrenheit and line two baking sheets with parchment paper. This keeps the cookies from sticking and makes cleanup easier.
- Scoop the dough:
- Use a cookie scoop or tablespoon to portion out the dough into balls and place them about two inches apart on the prepared baking sheets. They'll spread a little, so give them room.
- Bake until set:
- Bake for ten to twelve minutes, or until the edges are set but the centers still look soft. They might seem underbaked, but they'll firm up as they cool.
- Cool before serving:
- Let the cookies cool on the baking sheets for five minutes, then transfer them to a wire rack to cool completely. They're best when they've had a chance to set, but I won't judge if you eat one warm.
 Save to Pinterest
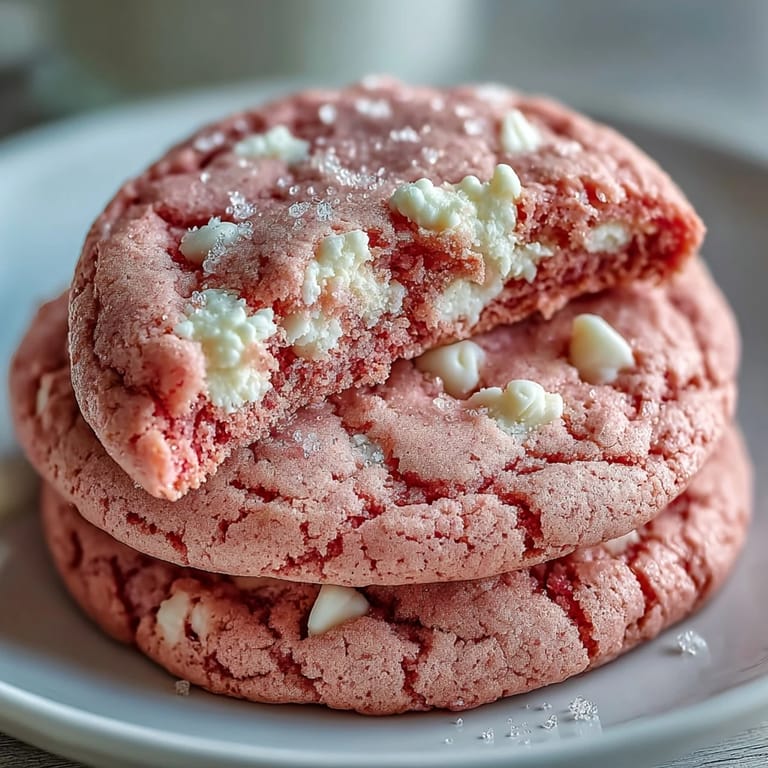
 One evening, my neighbor stopped by just as I was pulling a batch out of the oven. She stayed for tea, and we ate four cookies each while talking about nothing in particular. Later, she texted me to say it was the best part of her week. I realized then that these cookies aren't just about the recipe, they're about the moment you share them.
How to Store These Cookies
I keep them in an airtight container on the counter, and they stay soft for up to a week. If you want to freeze them, layer them between sheets of parchment paper and store them in a freezer bag for up to three months. They thaw in about twenty minutes, and honestly, they taste just as good as the day you baked them.
Ways to Customize the Flavor
If you want to add a little something extra, try half a teaspoon of almond extract or a few drops of rose water. I've also folded in freeze-dried raspberry powder for a hint of tartness, and it was incredible. You can press extra white chocolate chips on top before baking if you want them to look a little fancier, and no one will complain about more chocolate.
Serving Suggestions
These cookies are perfect on their own, but I've also used them to make cookie sandwiches with cream cheese frosting in the middle. They're great with a glass of cold milk, or you can crumble one over a bowl of vanilla ice cream. If you're feeling fancy, serve them on a pretty plate with fresh berries on the side.
- Pair them with a cup of hot tea or coffee for an afternoon treat.
- Pack them in a tin and give them as a gift, because everyone loves homemade cookies.
- Make a double batch and freeze half the dough so you can bake fresh cookies whenever the craving hits.
 Save to Pinterest
 These cookies have become my go-to whenever I need something cheerful, easy, and reliable. I hope they bring you as much joy as they've brought my kitchen.
Common Questions
- → What makes pink velvet cookies different from regular chocolate chip cookies?
Pink velvet cookies feature a vibrant hue from food coloring and a softer, more tender crumb similar to red velvet. The combination of vanilla and white chocolate creates a creamier flavor profile compared to traditional chocolate chip varieties.
- → Why is chilling the dough important?
Chilling for 30 minutes prevents excessive spreading during baking, resulting in thicker cookies with soft centers and slightly crisp edges. This step also allows flavors to meld together for better taste.
- → Can I use liquid food coloring instead of gel?
Liquid food coloring works but may require more quantity to achieve the same vibrant pink shade. Be aware that adding too much liquid can alter the dough consistency, so start with small amounts.
- → How do I know when the cookies are done?
The edges should appear set while centers remain slightly soft. They may look underbaked when removed from the oven but will firm up as they cool on the baking sheet for 5 minutes.
- → Can I freeze the cookie dough?
Yes, scoop dough balls and freeze on a baking sheet before transferring to a freezer bag. Bake from frozen, adding 1-2 minutes to the baking time. Frozen dough keeps for up to 3 months.
- → What can I substitute for white chocolate chips?
Raspberries, dark chocolate chips, or chopped nuts work well as alternatives. For a different flavor profile, try adding dried strawberries or white chocolate chunks for larger pockets of sweetness.