 Save to Pinterest
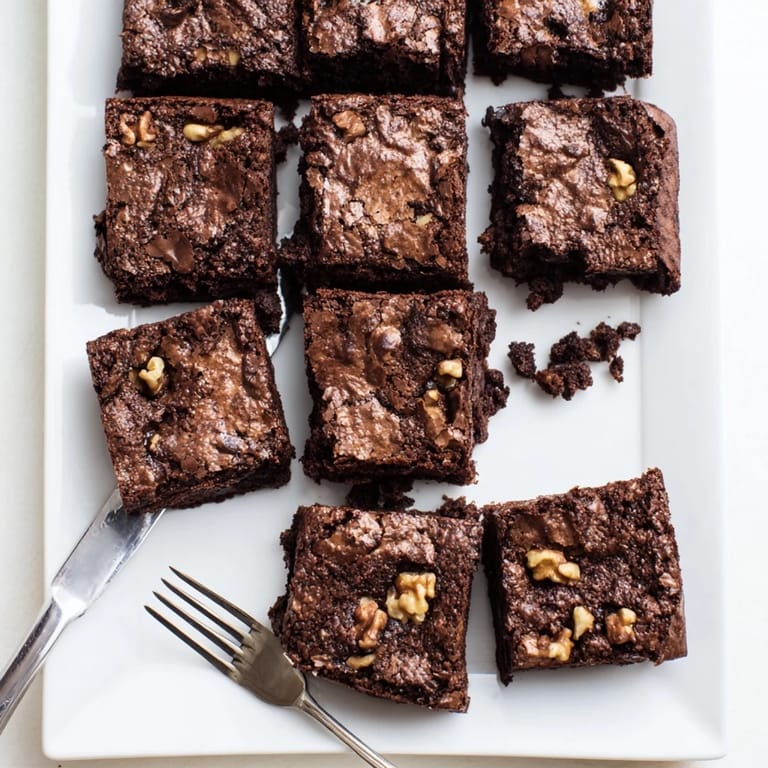
 I was having one of those weeks where everything felt slightly off kilter, and I found myself standing in my kitchen at 11 PM craving something deeply chocolatey and uncomplicated. No fancy techniques, no waiting hours for dough to rise, just melting chocolate and butter together and watching something beautiful happen. The smell hit me first that rich cocoa aroma that somehow makes everything feel like it will be okay. These brownies became my midnight therapy session, and now they are my go to whenever I need to reset my mood.
My sister called me once while I was mid way through mixing these, and I had to hold the phone with one shoulder while stirring molten chocolate with the other. She could hear the clinking of the whisk against the saucepan and immediately asked what I was making. When I told her brownies, she showed up at my door twenty minutes later with vanilla ice cream, claiming she just happened to be in the neighborhood. Now we make them together whenever we need sister time.
Ingredients
- 170 g semi sweet chocolate chopped: I have tried every chocolate variety, and semi sweet hits the perfect balance between too bitter and cloyingly sweet. Chopping it yourself helps it melt evenly.
- 115 g unsalted butter: Room temperature butter incorporates better, but honestly I have used cold butter in a pinch and it still turns out fine.
- 200 g granulated sugar and 50 g light brown sugar: The combination creates that signature crackly top and chewy edge. The brown sugar adds a subtle caramel depth.
- 2 large eggs: Room temperature eggs blend more smoothly into the warm chocolate mixture without scrambling.
- 1 tsp vanilla extract: Do not skip this. It amplifies the chocolate flavor in ways you will not expect.
- 80 g all purpose flour: Measured correctly, not scooped directly from the bag. Too much flour makes these cakey instead of fudgy.
- 30 g unsweetened cocoa powder: Sift it to avoid stubborn lumps that will not break up no matter how much you stir.
- 1/4 tsp salt: Essential for cutting through all that sugar and letting the chocolate shine.
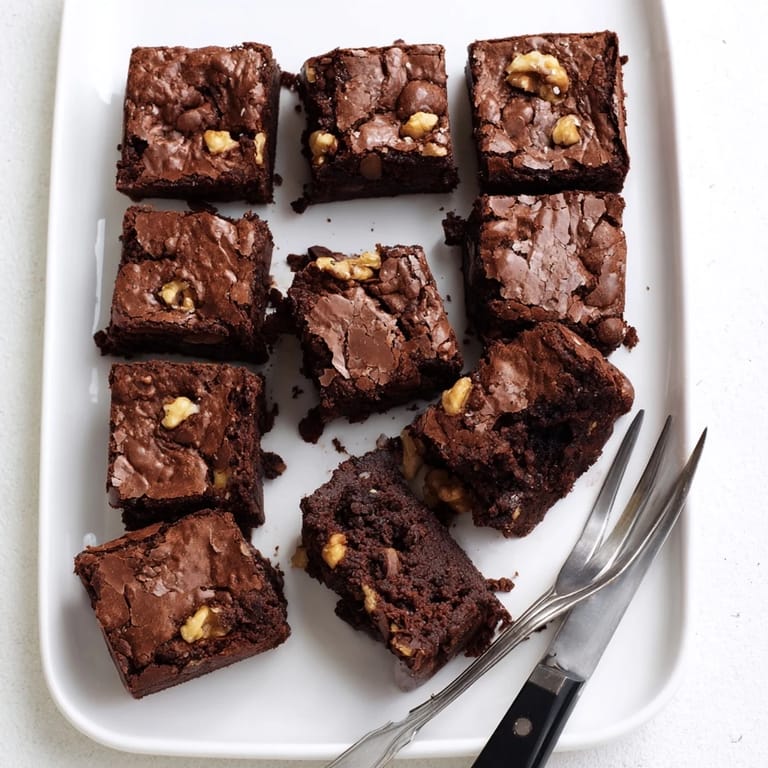
- 100 g chopped walnuts or pecans: Optional but highly recommended. Toast them lightly in a dry pan first for extra nutty flavor.
- 100 g chocolate chips: These create little pockets of melted chocolate throughout every bite.
Tired of Takeout? 🥡
Get 10 meals you can make faster than delivery arrives. Seriously.
One email. No spam. Unsubscribe anytime.
Instructions
- Preheat your oven to 175°C and prepare your pan:
- Line your 20 cm square baking pan with parchment paper, letting the paper hang over the edges. This overhang becomes your handle later when lifting the whole batch out at once.
- Melt the chocolate and butter together:
- Use a saucepan over the lowest heat setting your stove has, stirring constantly until smooth and glossy. This slow melting prevents the chocolate from seizing and developing a grainy texture.
- Whisk in both sugars:
- The mixture will look slightly grainy and thick, which is exactly right. Keep whisking until the sugars have dissolved into the warm chocolate base.
- Add eggs one at a time:
- Whisk each egg completely into the batter before adding the next. This creates that beautiful shiny meringue like top that everyone loves.
- Stir in the vanilla:
- Make sure to scrape down the sides of the pan to get every bit of that fragrant vanilla incorporated.
- Fold in the dry ingredients:
- Sift the flour, cocoa powder, and salt directly into the pan. Use a spatula to fold gently until just combined. Some dry streaks are better than overmixed batter.
- Add your mix ins:
- Gently fold in the toasted nuts and chocolate chips if using them. Distribute them evenly throughout the batter.
- Spread and bake:
- Pour the batter into your prepared pan and smooth the top. Bake for 22 to 28 minutes until a toothpick comes out with moist crumbs, not wet batter.
- Cool completely:
- This is the hardest part. Let them cool completely in the pan before lifting them out using the parchment paper and cutting into squares.
 Save to Pinterest
 Last summer my neighbor caught the smell of these baking through our open kitchen window and knocked on my door just as they came out of the oven. We ended up eating them warm on her back porch while watching fireflies, and she admitted she had been secretly learning to bake but was too nervous to try brownies. Now we have a standing Friday night brownie date.
Getting That Crackly Top
The secret is in how you incorporate the eggs. Whisking them vigorously into the warm sugar and chocolate mixture creates a thin meringue like layer that rises to the top during baking. Do not rush this step even if your arms get tired. That shiny crackly crust is what makes people ask what bakery you bought these from.
Pan Size Matters
An 8 inch square pan creates the ideal thick fudgy texture. Using a larger 9 inch pan will give you thinner brownies that bake faster and become more cakey. I once made the mistake of using a 9 by 13 inch pan and ended up with something that was more like a cookie bar. Delicious, but definitely not what I was going for.
Storage and Make Ahead Tips
These actually improve after sitting overnight wrapped tightly in foil. The flavors deepen and the texture becomes even more fudgy. I have also frozen uncut slabs wrapped in plastic and foil for up to three months, then thawed them overnight on the counter for emergency chocolate cravings.
- Warm individual squares in the microwave for 15 seconds for that fresh baked experience
- Store at room temperature for up to 4 days or refrigerate for longer keeping
- Press extra chocolate chips into the top before baking for extra chocolate pockets
 Save to Pinterest
 These brownies have gotten me through heartbreak, celebrations, and countless Tuesday nights when nothing else would do. I hope they become your comfort too.
Common Questions
- → What makes these brownies fudgy?
The high ratio of chocolate and butter to flour creates that dense, fudgy texture. Using both granulated and brown sugar adds moisture and contributes to the crackly top formation while keeping the center soft and rich.
- → How do I know when brownies are done?
Insert a toothpick into the center—it should come out with a few moist crumbs, not completely clean. This ensures the brownies remain fudgy rather than cake-like. They'll continue setting as they cool.
- → Can I make these nut-free?
Absolutely. Simply omit the walnuts or pecans, or replace them with seeds like pumpkin or sunflower seeds for added crunch without the nuts. The chocolate chips can stay or be removed depending on preference.
- → Why do brownies get a crackly top?
The crackly top forms when sugar rises to the surface during baking and caramelizes. Using both granulated and brown sugar, along with proper mixing techniques, helps achieve this signature texture that brownie enthusiasts love.
- → How should I store these?
Keep in an airtight container at room temperature for up to 3 days. For longer storage, refrigerate for up to a week or freeze individually wrapped squares for up to 3 months. They actually taste better the next day as flavors develop.
- → Can I use different chocolate?
Yes, though semi-sweet provides the ideal balance. Dark chocolate (60-70%) yields a more intense flavor, while milk chocolate makes them sweeter. Avoid white chocolate as it lacks cocoa solids needed for structure.