Save to Pinterest
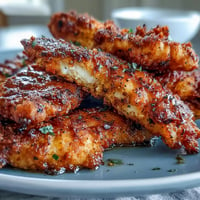
 My kitchen smelled like toasted garlic and herbs the afternoon I stopped buying frozen chicken strips for good. I was standing at the counter, staring at plain chicken breasts and a bag of panko, wondering if I could really pull off that golden crunch without a deep fryer. Twenty minutes later, I had proof that the oven could do magic. These strips came out so crispy and flavorful that my partner thought I'd secretly fried them, and I've never looked back since.
I remember the first time I served these at a casual dinner with friends. Everyone was skeptical when I said they were baked, not fried. One friend picked up a strip, took a bite, and paused mid-chew with this surprised look. The panko had crisped up perfectly, and the chicken stayed juicy inside. We ended up dipping them in three different sauces and debating which pairing was best, and that night these strips earned a permanent spot in my rotation.
Ingredients
- Boneless, skinless chicken breasts or tenders (500 g): I prefer tenders because they're already the right size, but breasts work just as well if you slice them into even strips so they cook uniformly.
- Salt (1/2 tsp) and ground black pepper (1/4 tsp): Simple seasoning lets the herbed crust shine, and patting the chicken dry before seasoning helps the coating stick better.
- All-purpose flour (100 g): This first layer creates a dry surface that the egg mixture clings to, preventing the breading from sliding off in the oven.
- Large eggs (2) and mayonnaise (2 tbsp): The mayo adds richness and helps the panko adhere like glue, plus it keeps the chicken moist while baking.
- Panko breadcrumbs (120 g): Panko's larger flakes crisp up beautifully in the oven, giving you that signature crunch without any frying.
- Dried Italian herbs (1 1/2 tsp), garlic powder (1/2 tsp), smoked paprika (1/2 tsp), and cayenne pepper (1/4 tsp, optional): This blend adds layers of flavor, and the smoked paprika gives a subtle warmth that makes the crust taste complex.
- Olive oil (2 tbsp): A light drizzle or spray helps the panko toast evenly and turn that perfect golden brown.
Tired of Takeout? 🥡
Get 10 meals you can make faster than delivery arrives. Seriously.
One email. No spam. Unsubscribe anytime.
Instructions
- Prep your oven and pan:
- Preheat your oven to 220°C (425°F) and line a baking sheet with parchment paper, or set a wire rack on top for extra air circulation. The rack trick makes the bottoms as crispy as the tops, which I learned after one too many soggy undersides.
- Cut and season the chicken:
- Pat the chicken completely dry with paper towels, then slice it into strips about 2 cm wide so they cook at the same rate. Season both sides with salt and pepper, keeping it simple so the herbed crust can do the talking.
- Set up your breading station:
- Grab three shallow bowls and fill the first with flour, the second with eggs whisked together with mayonnaise until smooth, and the third with panko mixed with Italian herbs, garlic powder, paprika, and cayenne if you like heat. This assembly line makes coating each strip quick and tidy.
- Coat each strip:
- Dredge a chicken strip in the flour and shake off any excess, dip it into the egg mixture until fully covered, then press it into the panko blend, making sure every surface is coated. I use one hand for wet ingredients and one for dry to avoid ending up with breaded fingers.
- Arrange and oil:
- Lay the coated strips on your prepared baking sheet with a little space between each one, then drizzle or spray them lightly with olive oil. That bit of oil is the secret to getting the panko golden and crispy instead of pale and dry.
- Bake and flip:
- Slide the pan into the oven and bake for 18 to 22 minutes, flipping the strips halfway through so both sides get evenly browned. They're done when the internal temperature hits 74°C (165°F) and the crust looks deeply golden.
- Rest before serving:
- Let the strips cool on the pan for 2 to 3 minutes so the coating sets and stays crunchy when you pick them up. Patience here makes all the difference between a perfect bite and a coating that slides off.
 Save to Pinterest
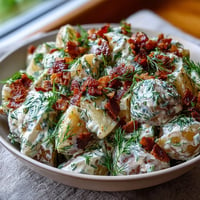
 One evening I made a double batch of these for a movie night, and we set out three different dipping sauces just for fun. Watching everyone debate whether honey mustard or spicy sriracha mayo was the winner turned into the best part of the night. These strips became more than dinner, they were an excuse to relax, laugh, and enjoy something simple done really well.
Serving Suggestions
I like to serve these with a handful of dipping sauces so everyone can customize their plate. Honey mustard is a classic pairing that balances the savory crust, ranch adds creamy coolness, and spicy sriracha mayo brings a little heat. A side of roasted vegetables or a crisp green salad keeps things light, and if you want to go full comfort mode, serve them alongside sweet potato fries or a simple coleslaw. They also make great leftovers tucked into wraps or sliced over salads the next day.
Customization Ideas
This recipe is forgiving and easy to adapt based on what you have or who you're feeding. For a gluten-free version, swap in gluten-free panko and flour without changing anything else. If you want extra richness, toss some grated Parmesan into the panko mixture before coating the chicken. Greek yogurt can replace the mayonnaise for a lighter, tangier egg wash, and you can dial the heat up or down by adjusting the cayenne or adding a pinch of chili flakes. I've even used different herb blends like Cajun seasoning or lemon pepper when I want to change up the flavor profile.
Storage and Reheating
Leftover strips keep well in an airtight container in the fridge for up to three days, though they're always best the day you bake them. When you reheat them, skip the microwave because it makes the coating soft and sad. Instead, spread them on a baking sheet and warm them in a 200°C (400°F) oven for about 8 minutes, flipping once halfway through so both sides crisp back up. You can also freeze the coated raw strips on a tray, then transfer them to a freezer bag and bake straight from frozen, adding a few extra minutes to the cooking time.
- Store cooked strips in the fridge for up to three days and reheat in the oven to restore crispiness.
- Freeze raw coated strips for up to two months and bake directly from frozen when you need a quick meal.
- Avoid microwaving leftovers if you want to keep that golden crunch intact.
 Save to Pinterest
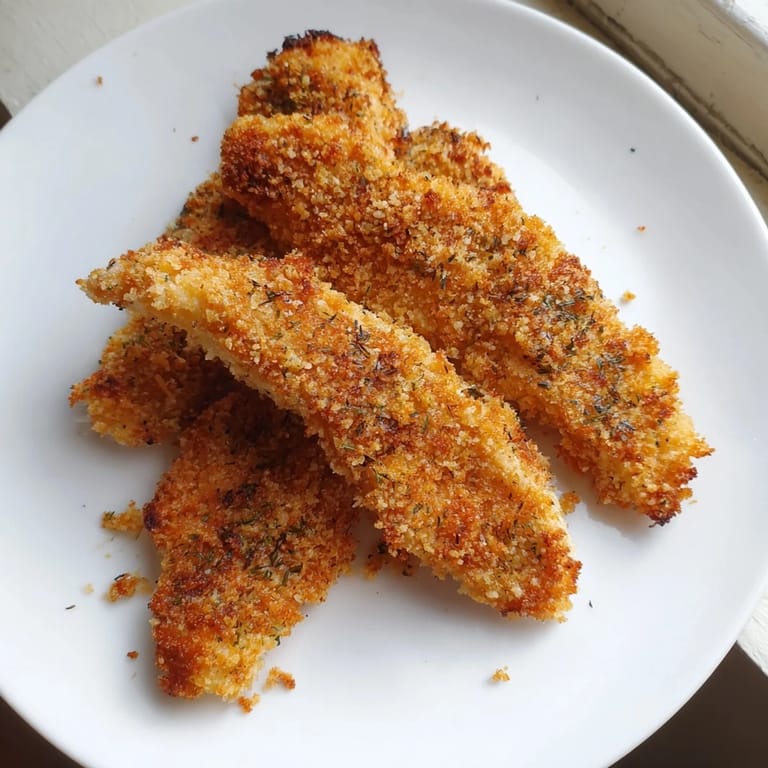
 These crispy panko chicken strips have become my go-to whenever I want something satisfying without the fuss of frying. They bring that perfect crunch to the table every time, and watching people reach for seconds never gets old.
Common Questions
- → How do I keep the panko coating crispy?
Use a wire rack on your baking sheet to allow air circulation underneath the chicken. Flip the strips halfway through baking, and avoid covering them while cooking. Let them cool for 2-3 minutes after removing from the oven before serving.
- → Can I prepare these ahead of time?
Yes, you can bread the chicken strips up to 4 hours in advance and refrigerate them on a covered tray. Bake directly from the refrigerator, adding 2-3 minutes to the cooking time. For longer storage, freeze breaded strips for up to 3 months and bake from frozen, adding 5-7 minutes to the cooking time.
- → What's the best way to check if chicken is fully cooked?
Use a meat thermometer to ensure the internal temperature reaches 74°C (165°F) at the thickest part. Alternatively, cut into the largest piece to confirm no pink remains and juices run clear.
- → Can I use chicken thighs instead of breasts?
Yes, chicken thighs work well and tend to stay moister during baking. Cut them into similar-sized strips and follow the same breading and baking instructions. Thighs may take 1-2 minutes longer to cook through.
- → What dipping sauces pair well with these strips?
Try honey mustard, ranch, sriracha mayo, garlic aioli, or barbecue sauce. The herbed panko coating complements both creamy and tangy condiments beautifully.
- → How do I make this gluten-free?
Simply substitute regular flour and panko with certified gluten-free alternatives. Many brands now offer gluten-free panko breadcrumbs that provide the same crispy texture. Always verify that other ingredients like seasonings and mayonnaise are gluten-free as well.