 Save to Pinterest
 The smell of cinnamon hitting warm apples still pulls me back to my grandmother's kitchen, where I learned that patience is the secret ingredient in any good pie. I used to rush through everything, but she'd stand by the window watching the crust turn golden, telling me that good things need time. Now I understand why she took such care with every step, from cutting butter into flour to arranging those apple slices just so.
Last Thanksgiving, I made three of these pies because my family insisted on taking slices home. My brother actually called me the next day asking for the recipe, which is saying something since he usually just asks when dinner is ready. That moment when you slide the first warm slice onto a plate and watch the steam curl up—thats the kind of kitchen memory that sticks with you.
Ingredients
- All-purpose flour: The backbone of your crust, protein structure creates those flaky layers we all love
- Cold unsalted butter: Keeping it ice cold is non-negotiable, those little butter pockets create steam and lift
- Ice water: Just enough to bring the dough together without making it tough, add it gradually
- Granny Smith and Honeycrisp apples: The tart firmness of Granny Smith balanced with Honeycrisp sweetness gives perfect texture and flavor
- Both granulated and brown sugar: White sugar provides crisp sweetness while brown sugar adds deep caramel notes
- Ground cinnamon and nutmeg: Classic warm spices that make everything taste like comfort and home
- Lemon juice: Just a tablespoon brightens all those flavors and keeps apples from browning
- Egg and milk: Together they create that beautiful golden sheen on your finished crust
Tired of Takeout? 🥡
Get 10 meals you can make faster than delivery arrives. Seriously.
One email. No spam. Unsubscribe anytime.
Instructions
- Make the Pie Crust:
- Whisk flour, salt, and sugar in a large bowl, then work in cold butter with your fingertips or pastry blender until you see coarse, pea-sized crumbs throughout. Drizzle in ice water a tablespoon at a time, tossing gently with a fork until the dough just holds together when squeezed—do not overwork it or your crust will be tough. Shape into two disks, wrap tightly, and let rest in the refrigerator for at least an hour.
- Prepare the Apple Filling:
- Peel, core, and slice your apples into quarter inch thick pieces, then toss them in a large bowl with both sugars, spices, salt, flour, and that splash of lemon juice. Let everything sit for about ten minutes so the apples start releasing their juices.
- Assemble the Pie:
- Roll out one chilled dough disk on a lightly floured surface, gently fit it into your pie dish, and trim any overhang. Fill with those spiced apples, mounding them slightly higher in the center since they will cook down, then dot with small butter pieces all over the top. Roll out the second disk, place it over your filling, trim and crimp the edges together, and cut a few decorative slits to let steam escape during baking.
- Egg Wash and Bake:
- Whisk the egg with milk and brush this mixture all over your top crust, then sprinkle with coarse sugar for that bakery style sparkle. Bake on the lower rack at 400 degrees for forty five to fifty five minutes until deeply golden, tenting the edges with foil if they brown too quickly.
- Cool and Serve:
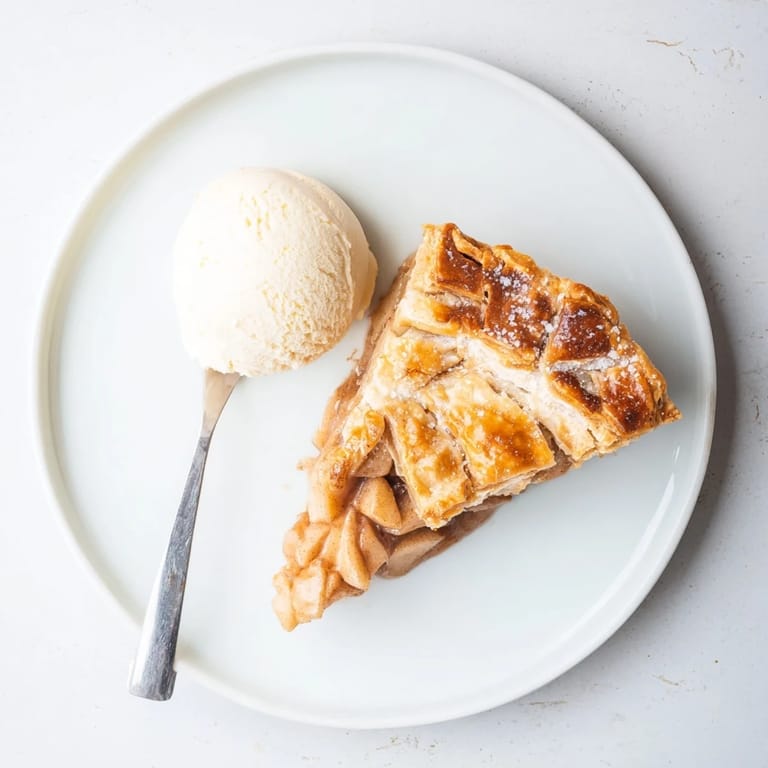
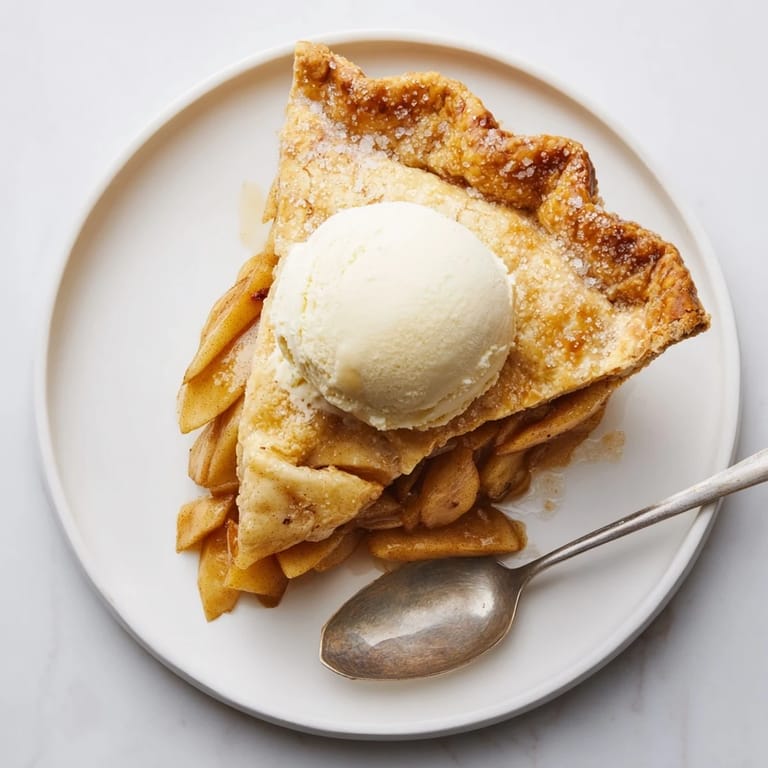
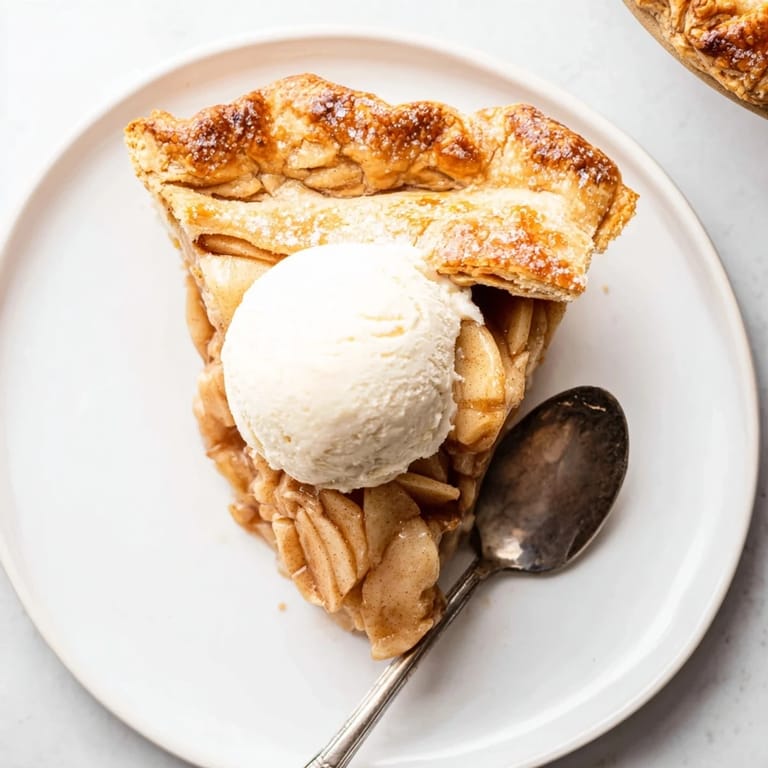
- This is the hardest part—let the pie rest on a wire rack for at least two full hours so the filling sets properly. Slice and serve warm, ideally with vanilla ice cream melting over each piece.
 Save to Pinterest
 Something magical happens when you bring a homemade apple pie to the table—conversations stop, people smile, and suddenly everyone has time for dessert. My neighbor actually knocked on my door once just to ask what I was baking because the scent had drifted down the entire street.
Making It Your Own
Once you have the basic technique down, do not be afraid to play around with spices and additions. A pinch of ginger or a handful of golden raisins can transform this classic into something uniquely yours. I have even added a splash of bourbon to the filling during holiday seasons, which always gets interesting reviews.
Crust Confidence
The first few times I made pie crust, I almost gave up because it seemed too fussy and sensitive. Then someone told me to treat it gently but not fearfully, and suddenly everything clicked. Your hands will learn the right texture, and eventually you will not even need to measure the water.
Serving Suggestions
While vanilla ice cream is the classic pairing, do not overlook a slice of sharp cheddar cheese on the side or a drizzle of salted caramel sauce. During autumn, I love serving this with warm spiced cider or a cup of coffee after a long walk through the falling leaves.
- Reheat individual slices in a 350 degree oven for about ten minutes to recapture that fresh baked warmth
- Wrap any leftovers tightly and they will keep at room temperature for two days, though they rarely last that long
- The pie freezes beautifully for up to three months—just wrap it well before freezing and thaw overnight in the refrigerator
 Save to Pinterest
 There is something deeply satisfying about serving a pie you made from scratch, watching people take that first bite and seeing their faces light up. I hope this recipe finds its way into your regular rotation and creates as many happy moments in your kitchen as it has in mine.
Common Questions
- → What apples work best for filling?
A mix of Granny Smith and Honeycrisp provides the perfect balance of tartness and sweetness. Granny Smith holds shape during baking while Honeycrisp adds natural sweetness and tender texture.
- → Why must the butter be cold?
Cold butter creates small pockets of steam during baking, resulting in flaky layers. Warm butter melts into the flour, making the crust tough rather than tender and layered.
- → How long should the pie cool before slicing?
Allow at least 2 hours of cooling time. This lets the filling set properly so slices hold their shape. Cutting too soon results in runny filling and messy presentation.
- → Can I make the dough ahead?
Absolutely. Prepare the dough disks, wrap tightly in plastic, and refrigerate up to 2 days or freeze for up to 3 months. Thaw overnight in the refrigerator before rolling.
- → How do I prevent burnt edges?
If edges brown too quickly, cover with a pie shield or foil ring after 25-30 minutes. This protects the delicate crust perimeter while allowing the center to cook through completely.