 Save to Pinterest
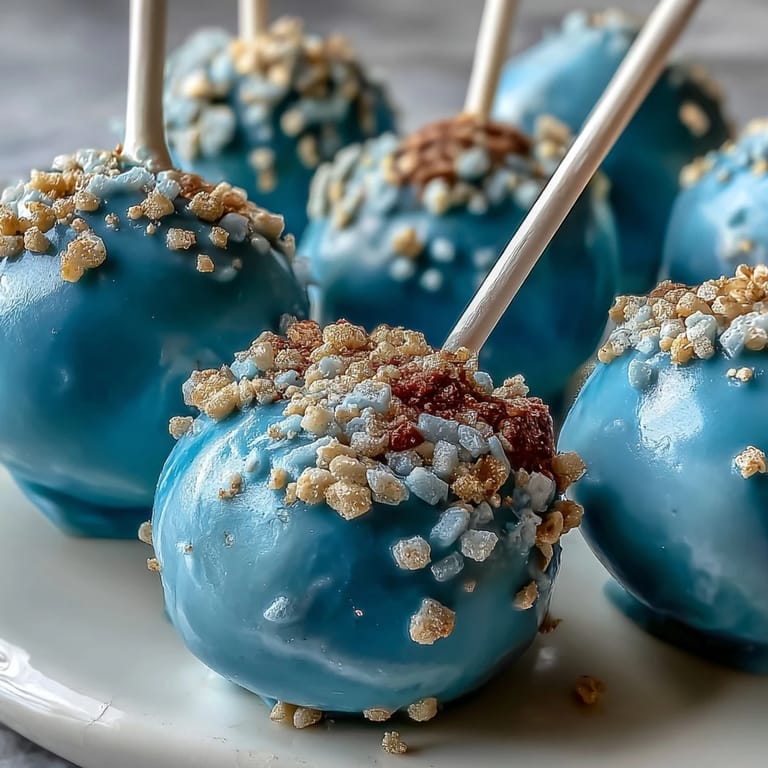
 My friend texted me three weeks before graduation asking if I could make something special for the ceremony party—something that screamed school spirit without being too serious. I'd never made cake pops before, but the idea of rolling cake into little balls and dunking them in color felt like the perfect way to celebrate. That afternoon, standing in my kitchen with bowls of bright candy melts and a pile of gold sprinkles, I realized this wasn't just about making dessert. It was about turning sugar and butter into tiny edible confetti for a moment everyone had been waiting for.
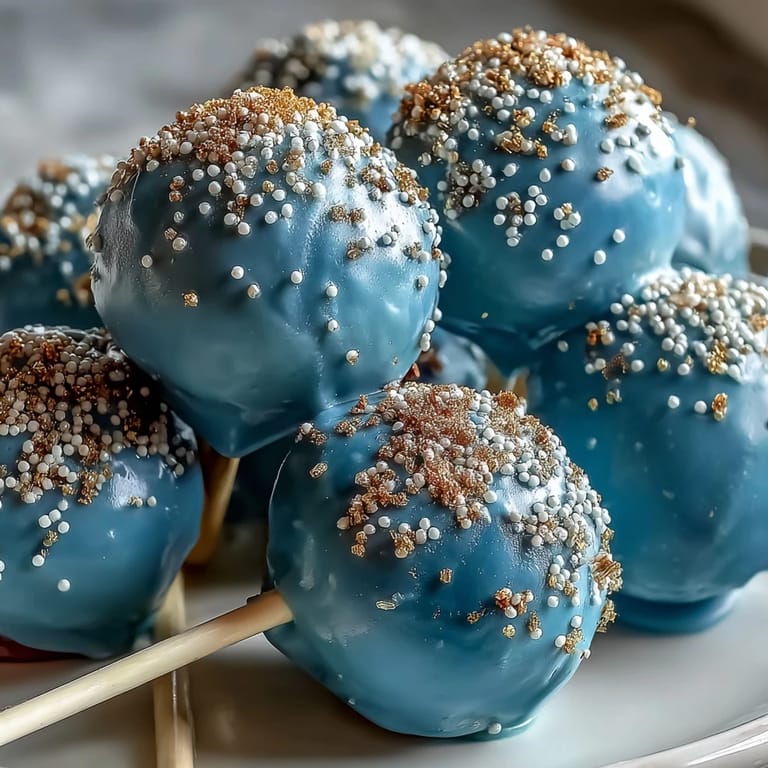
I remember my cousin helping me dip each pop that night, and we fell into this rhythm where she'd coat while I sprinkled gold. She kept making jokes about how they looked like tiny graduation caps, and suddenly what felt like a tedious task became the kind of kitchen moment you actually want to remember. By the time we'd finished, we had 24 perfect little pops lined up in the Styrofoam block, and I knew every single person at that party would taste how much care went into them.
Ingredients
- Vanilla or chocolate cake mix: This is your foundation—don't overthink it; box mix is honestly your friend here because it's consistent and reliable every time.
- Unsalted butter: Softened butter creams better and gives the frosting a silky texture that'll bind your cake crumbs without adding salt.
- Powdered sugar: The finer texture matters; it dissolves smoothly into frosting instead of leaving grainy bits.
- Milk and vanilla extract: These two create moisture and flavor in the frosting—don't skip them even though they seem small.
- Candy melts in school colors: They're specifically designed for dipping and set faster than chocolate, making them perfect for this project.
- Vegetable shortening or coconut oil: This optional addition thins the candy melts just enough to make dipping smooth and keeping the coating thin rather than thick and clumpy.
- Gold sprinkles or edible gold glitter: Applied while wet, the gold sticks beautifully and catches light in a way that feels genuinely celebratory.
- Lollipop sticks: Pick food-grade ones; they're sturdy enough to hold the weight without snapping or splinting.
Tired of Takeout? 🥡
Get 10 meals you can make faster than delivery arrives. Seriously.
One email. No spam. Unsubscribe anytime.
Instructions
- Bake and cool the cake:
- Follow the box instructions completely, and patience matters here—let that cake cool all the way to room temperature or even chill it so it crumbles more easily. A warm cake will make your cake balls fall apart when you roll them.
- Whip up the frosting:
- Beat the butter until it's pale and creamy, then gradually add the powdered sugar so it incorporates smoothly without flying everywhere. The milk and vanilla finish it off with moisture and flavor that ties everything together.
- Mix cake and frosting:
- Crumble that cake into fine pieces and add frosting slowly—you want a mixture that holds together when you squeeze it, not something wet and sticky. This is where you get to taste and adjust; it's your cake, after all.
- Roll into balls:
- Use about a tablespoon of mixture per pop and roll between your palms, making them as even as you can so they'll look uniform after dipping. The more consistent they are, the more professional they'll look sitting on a platter.
- Chill until firm:
- At least an hour in the fridge or thirty minutes in the freezer—cold cake balls don't fall apart when they meet hot candy melts. This step is non-negotiable if you want success.
- Secure the sticks:
- Dip the stick end into melted candy to create a little anchor inside each ball, pushing it halfway in so it's stable. This prevents sticks from spinning or falling out once you start dipping the whole pop.
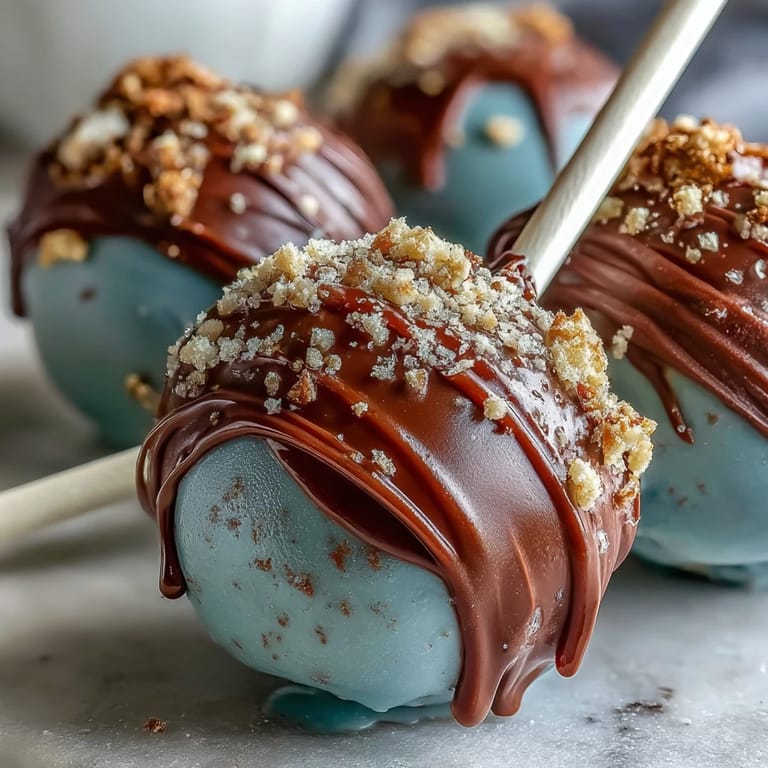
- Dip in candy color:
- Melt your candy melts according to package directions and add a touch of shortening if you want a thinner, smoother coating that looks almost glossy. Dip each pop smoothly and tap off excess so the coating is even, not dripping.
- Add gold while wet:
- Sprinkle generously while the coating is still sticky so the gold adheres permanently. Once it sets, any sprinkles you add won't stick, so timing is everything here.
- Set and harden:
- Stand each pop upright in the Styrofoam block and leave them untouched until the coating is completely hard—usually about thirty minutes. This is when they transform from wet and delicate into sturdy, shiny little celebration bites.
 Save to Pinterest
 What surprised me most was watching people at the party pick these up and actually admire them before eating—they weren't just dessert, they were tiny edible decorations that celebrated the whole day. That's when I understood why cake pops feel special; they're an excuse to make something beautiful that also tastes incredible.
Choosing Your Colors
The magic of these pops is how the school colors immediately set the mood without you having to do anything fancy. If your school uses navy and gold, one pop in navy and one in gold creates natural balance on a platter. If it's crimson and white, alternate them or create a pattern—whatever feels right to you. The gold sprinkles tie both colors together, so even if your two main colors don't traditionally match, they'll feel cohesive once you dust them.
Make-Ahead Strategy
I learned that you can bake and freeze the cake days in advance, and the frosting actually keeps in the fridge for up to a week, so spreading this project across several days is totally reasonable. Roll your balls the day before, keep them in an airtight container in the fridge, and dip and decorate on the morning of your event. The finished pops last three days at room temperature or a full week refrigerated, so they're forgiving if your timeline shifts.
Personal Touches and Variations
Beyond the two school colors, you can absolutely add ribbons in matching colors around each stick, which makes them feel like tiny ceremony favors. Some people dip halfway so you see both cake and color, or use a lighter colored candy melt with a darker base for a layered effect. The beauty is that the recipe is flexible—experiment with what feels most like your school's style, and remember that homemade always trumps store-bought because everyone tastes the care.
- Try chocolate cake mix with metallic candy melts for a richer, more sophisticated look.
- If you have time, arrange them in boxes with tissue paper in school colors for a gift-worthy presentation.
- Make extra and freeze them; they thaw beautifully and you'll always have celebration-ready dessert on hand.
 Save to Pinterest
 These cake pops turned out to be the dessert people talked about long after the party ended, and that's because they felt made with intention. Whether you're celebrating graduation, a birthday, or any moment worth remembering, these little golden bites carry the excitement of whatever's being celebrated right into each bite.
Common Questions
- → How do I ensure the cake pops hold together well?
Use just enough frosting to bind the crumbled cake without making the mixture too wet. Chill shaped balls thoroughly before dipping.
- → What’s the best way to get a smooth candy coating?
Melt candy melts carefully and stir in vegetable shortening or coconut oil for a smoother finish when dipping.
- → Can I customize colors for different schools?
Yes, select candy melts in desired school shades and use complementary gold sprinkles for a personalized look.
- → How long should the pops be chilled before decorating?
Chill the cake balls for at least 1 hour or freeze for 30 minutes to ensure firm shaping prior to dipping.
- → What storage method keeps pops fresh?
Store in an airtight container at room temperature for up to 3 days or refrigerate up to 1 week.