 Save to Pinterest
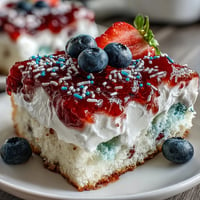
 As soon as summer starts shimmering through the kitchen window, my mind wanders to all things colorful and cool. That&aposs how I landed on making this Rainbow Jelly Cake for a backyard dinner, the kind where everyone is barefoot and humming along to old tunes. The first time I layered the jelly, I was amazed at how quickly the colors set while I scrambled to mix the next bowl. The coconut cream layer came together in a cloud of sweetness, melted over a gentle stove hum, and before I knew it the whole cake was sparkling in the fridge. There&aposs just something about unmolding a glossy, wobbly rainbow that makes you grin like a kid.
One clear memory sticks with me: I made this cake for a friend&aposs birthday when the power flickered out mid-layer, leaving us giggling in candlelight and fanning jelly trays with a folded magazine. We kept layering rainbows by feel, our hands stained faintly with food coloring, and somehow the cake turned out even more magical for the chaos. Later, slicing into it at the party, people gasped at the cheerful stripes, and it instantly felt like a celebration. Even the smallest spoonful brought smiles all around the table. Sometimes food just brings out the joyful mess in everyone.
Ingredients
- Agar-agar powder (2 tablespoons for jelly, 2 tablespoons for coconut layer): This key ingredient sets the jelly firmly and gives that signature bounce; be sure to whisk continuously for no clumps.
- Water (900 ml for jelly, 200 ml for coconut layer): Cold water helps agar-agar dissolve best before heating, and measuring exactly keeps textures just right.
- Granulated sugar (200 g for jelly, 100 g for coconut layer): Play with the sugar a little—taste as you go so it&aposs sweet but not overpowering.
- Food colorings (red, orange, yellow, green, blue, purple): Use just a drop or two per layer for vibrant but clear colors, and natural coloring works beautifully if you prefer.
- Vanilla extract (1 teaspoon, optional): Introduces a gentle comfort behind the bold visuals; don't skip if you love nuance.
- Coconut cream (400 ml): Choose full-fat coconut cream for that lush mouthfeel in the final layer.
- Pinch of salt: Balances the sweetness and brings out the coconut flavor—trust me, it makes a difference.
Tired of Takeout? 🥡
Get 10 meals you can make faster than delivery arrives. Seriously.
One email. No spam. Unsubscribe anytime.
Instructions
- Jelly Base Magic:
- Empty agar-agar powder into a saucepan with cold water and stir vigorously as it heats; listen for that soft simmer while the mixture shifts from cloudy to clear.
- Sugar and Scent:
- As soon as the agar-agar dissolves, add sugar and, if you’re feeling it, a splash of vanilla—breathe in that sweet floral scent drifting upward.
- Colorful Prep:
- With quick hands, divide your clear jelly across six bowls and transform each with a swirl of color, marveling at the spectrum assembling before you.
- Layer Up:
- Pour the first color gently into your mold, watch it shimmer, and use your fingertip to test for just-set before repeating with the next color, layering each with care so the rainbows stay crisp.
- Coconut Cream Caress:
- Wipe out the pan, pour in coconut cream, water, and agar-agar, stirring gently so it stays silky and doesn’t catch—add sugar and salt, and simmer until smooth and rich.
- Finishing Touch:
- Wait until the last jelly layer feels firm, then slowly pour the warm coconut mixture over the top—it will sink in gently and form a dreamy white cap.
- Chill and Reveal:
- Slide the mold into the fridge and let it set completely; once firm, run a knife round the edge and flip it out for the big reveal—rainbows never fail to impress.
- Serving Slices:
- Cut through those vivid layers and serve cold, preferably somewhere sunny and cheerful.
 Save to Pinterest
 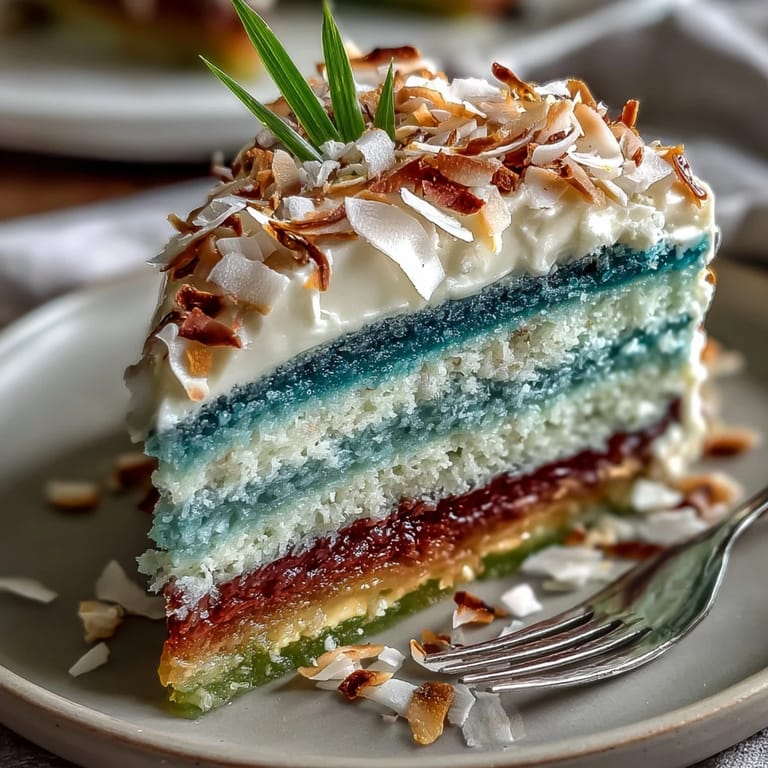 Save to Pinterest
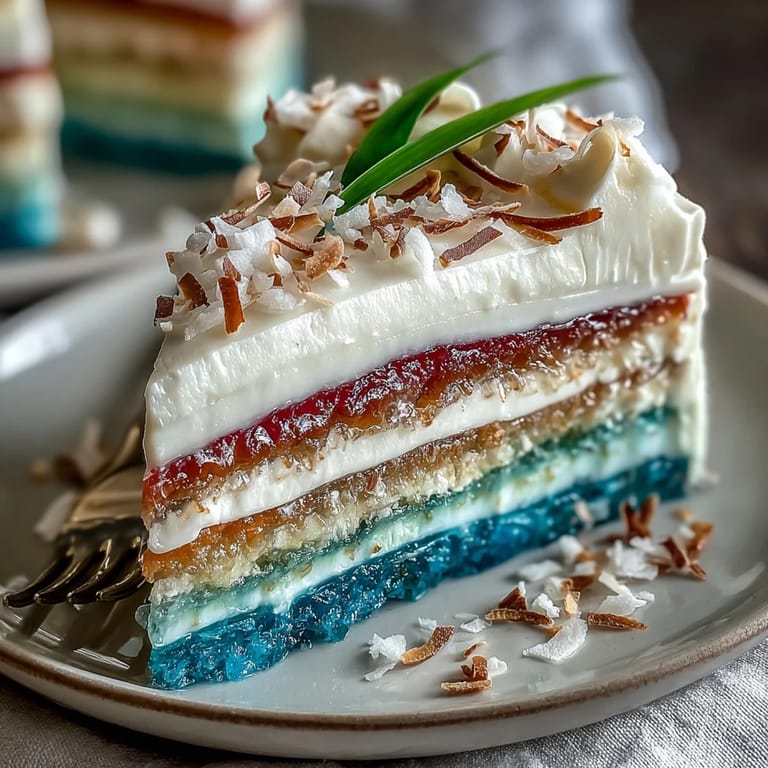
 The most unexpected delight came when my youngest cousin, usually skeptical of anything "healthy," declared this was the best birthday cake because it jiggled and tasted like a tropical holiday. Suddenly, we were all waving our wobbly slices in the air and laughing, the living room transformed into a little island party. I realized right then that food communicates celebration even when it&aposs simple. That's the magic of a dish like this—the joy is contagious.
Making Clean, Distinct Layers
I learned to keep a small spoon handy and gently check each layer for that sweet spot—set but sill slightly tacky. Pouring the next color too soon means your rainbows blend, but waiting too long turns layers slippy. I also tilt the mold slightly to help guide the jelly evenly along the bottom. Sometimes my first batch is uneven, but a steady hand really does wonders after a practice run. In the end, even the mistakes make pretty swirls.
Choosing the Best Coconut Cream
The rich coconut finish only shines if you use a good, creamy variety—the solid, scooped cream at the top of the can works wonders. If separating occurs, I gently whisk the cream before measuring. Full-fat versions make for ultra-silky layers, while light coconut cream can turn out watery. I once used a generic brand, and the layer lacked that dreamy flavor, so now I always taste before using. Trust your palate and don't be shy about brand loyalty here.
Color and Flavor Inspirations
Sometimes I swap vanilla for pandan or rose for a Southeast Asian twist—it takes hardly any to dramatically shift the aroma. Layering with natural coloring, like beet for pink or spirulina for green, brings a subtle depth if you want a more wholesome approach. Experimenting with shapes—like stars or domes—gets kids excited, too. There&aposs so many ways to make this dessert your own, so don’t be afraid to get creative!
- If your agar-agar settles at the bottom, re-stir before pouring each layer.
- Work quickly between layers, but gently: patience keeps your colors pristine.
- Refrigerate leftovers in a sealed container so the jelly stays glossy and fresh.
 Save to Pinterest
 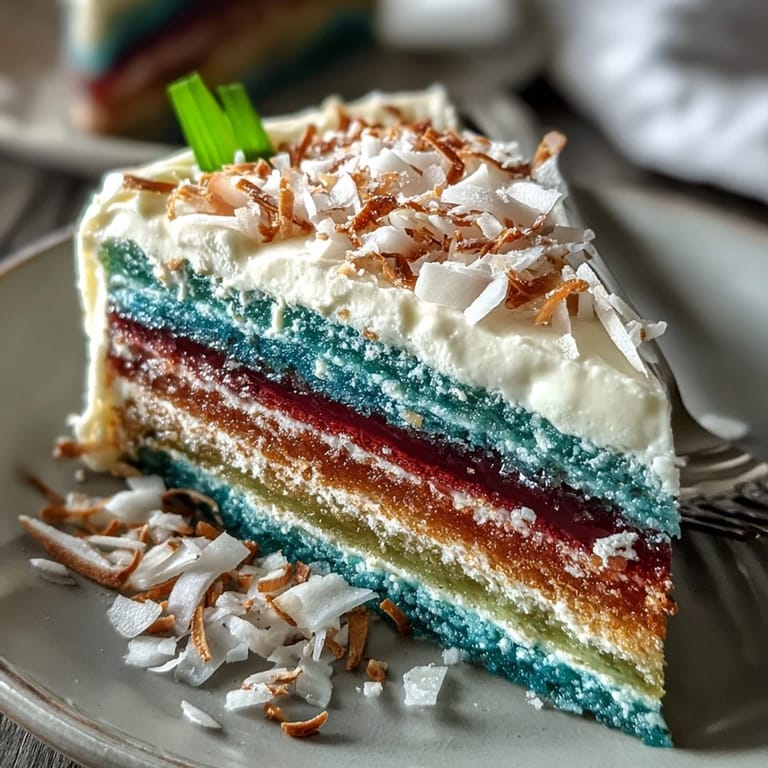 Save to Pinterest
 Whether for a sunny picnic or a surprise at-home party, this Rainbow Jelly Cake always feels like a celebration waiting to happen. May every slice bring a burst of happiness to your table!
Common Questions
- → How long should each agar-agar layer set before adding the next?
Wait until the surface is just set but still slightly tender, usually 5–8 minutes at room temperature. This prevents colors from mixing while allowing good adhesion between layers.
- → Can gelatin be used instead of agar-agar?
Gelatin behaves differently: it needs blooming in cold water and sets at a lower temperature. Substituting will change texture and stability, and gelatin is not suitable for vegan or high-heat applications without adjustments.
- → How do I prevent color bleeding between layers?
Pour each colored layer only after the previous layer is surface-set. Cool the mixture slightly so it isn’t piping hot when poured, and pour gently down a spatula or the mold wall to reduce forceful contact.
- → Why might the coconut cream layer separate or weep?
Separation can occur if the agar ratio is too low or the coconut mixture is not fully dissolved. Use the suggested agar amounts, simmer until dissolved, and cool slightly before pouring to improve binding and surface adhesion.
- → What's the best way to get neat slices?
Chill the set cake thoroughly, then use a hot, sharp knife—dip in hot water and wipe dry between cuts. A straight, decisive stroke gives cleaner edges than a sawing motion.
- → How long can the finished cake be stored?
Keep covered in the refrigerator for up to 3 days. Store in a single layer on a flat plate to prevent distortion; avoid freezing, which can change the agar texture.